Monday, December 8, 2014

Decor Refresh

We've been in this house nearly two years now, and somehow I've barely managed to get anything on the walls. Having Nat's family over for Thanksgiving was definitely inspiration to change that, at least in the main living areas!

I've been DIYing lots of decor lately, starting with this awesome Himmeli wreath.  You can find the tutorial for it over at Vintage Revivals.  Her instruction video was a little confusing in places, but this post helped me a lot when I got stuck.

The finished wreath has found a home in the corner of my dining room for now (after a few coats of bronze spray paint). Those hexes are made from Washi tape and were super easy! Tutorial here. I had originally planned on continuing them over onto the adjacent wall, but some of them are already peeling up (&^%!# textured walls, I hate them and want to burn them with fire), so I haven't done it yet.  Ideally I'd like to get some floating shelves up on that wall, but that requires $$ for supplies. Wood is expensive, yo.
  
The mantel got a little refresh - I dug out some printing press drawers I got at Maryland Sheep and Wool, oh, 3? 4? years ago? About damn time I incorporated them into some decor, haha. This setup will probably be short-lived, since Christmas decor (!!) is starting to make its way into the house.

Also, that deer - omfg. Being obsessed with both deer and brass right now, I was super thrilled to find it at a local thrift shop for only six bucks!


I was able to create a lot of awesome little gallery/vignette spaces around the living and dining room with things I've acquired over the last few months  - both through my own thrift/clearance hunting and the lovely Amberly.  Thriftstracted Club is basically amazeballs and if you haven't checked it out, you should! She curates little boxes of awesome based on a monthly theme and a survey she has you fill out, and I haven't been disappointed with a single one.


This awesome hex is a wire bowl I scored at Home Goods but couldn't find a good spot for. Love it on the wall!


Hopefully I'll have a Christmas post to share soon! I'm completely revamping my tree this year, almost entirely new ornaments, most of them DIY. It's taking a bit longer than expected, but I think it's going to be worth it! Here's a little sneak peek:


Wednesday, October 29, 2014

Fall Decor

It's fall! Finally! Now, if only Texas would get on board and drop below the 90s. We've had a few cold/rainy fronts come through and drop things into the 60s for a few days, but the temps always crank back up into the 80s/90s within a couple days.

With the brief glimpses at fall weather, I decided to get some fall decor up.  I decided it was high time to redo my mantel, and I made a cute fall bunting inspired by Amberly, cutting some triangles out of card stock and attaching them to ribbon using brads.


Obviously with Halloween coming up, I needed some pumpkins to go with my fall decor.  I'm always inspired by non-traditional carvings like these, and after seeing a few awesome sugar skull designs, I knew that I needed to make my own version.

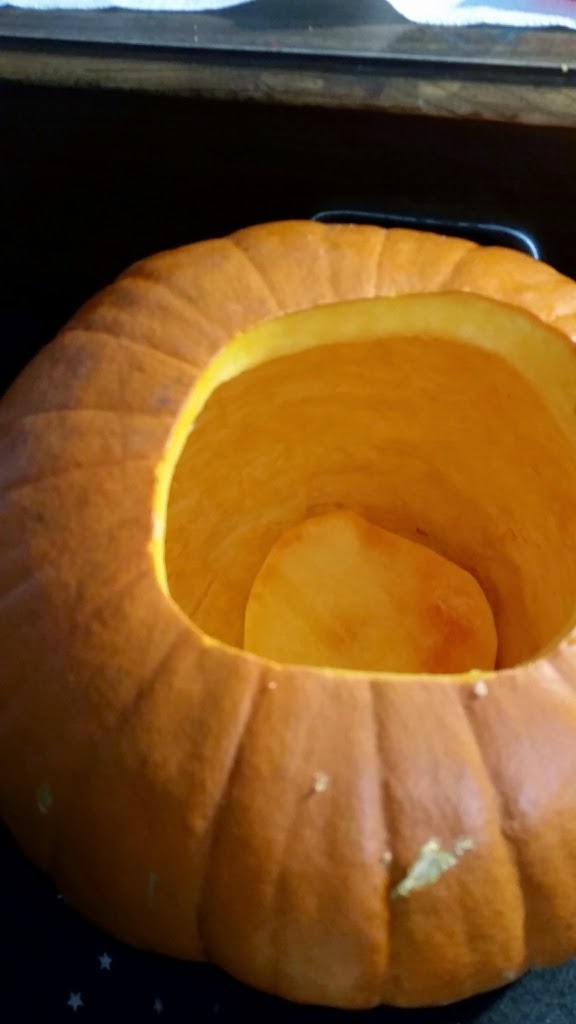
Starting with a gutted pumpkin, I drew starting design in pencil, then got to work carving.


Lino cutters are a great tool to carve designs into just the surface of the pumpkin. I would recommend shelling out the extra $5 or so for the Speedball one. I got the one pictured below from Hobby Lobby because I'd broken a bunch of the blades on my Speedball one, and I ended up just using the blades with the Speedball handle because it was much easier to use.
I also grabbed a multipurpose cutting set from Michaels, and ended up using it quite a bit as well.  I think overall you'd probably be fine buying one set or the other. I used tools from both sets, but this could be accomplished using one or the other.


I went over my pencil marked design with the lino cutter, making changes as I went until I was happy with the final design.


And yeah, maybe make sure not to point the sharp tools at your thumb...and if you're injury-prone like me, maybe also be sure to keep bandaids in your house.  Otherwise you'll slice your thumb open with a lino cutter then wrap it with neosporin, a paper towel, and tape. Klassy.

I also made a cute little vampire toothy one based on an older Martha Stewart tutorial.  Super cute!

Sadly, none of these lasted long enough to get outside and get better pics of! A couple days later, the sugar skull one had already rotted. Sadpants! I'm going to try to carve another before halloween (which is in, uh, two days? It's taken me forever to write this post, I'm a terrible blogger).  Not that anyone besides us would see it, last year we had a sum total of zero trick or treaters!

Sunday, August 31, 2014

Painted Upholstery Box Chairs

When I saw these chairs on craigslist, I was drawn in the price ($40 for the pair!) but unsure about them otherwise. They were stained, faded weirdly, and overall just gross looking in the pictures. So I sent the link to Mandi, who convinced me that they just needed some new fabric and pretty tapered legs.


I decided to go for them, only to find out they were in some weird warehouse that only had hours while I was at work. MIL to the rescue! She went and got them and brought them home for me, where they sat in my living room for longer than I care to admit waiting for a makeover. The idea of recovering the fabric was pretty overwhelming to me, but then I started stumbling across so many upholstery painting tutorials on the internets that I decided it was meant to be.

Planning for Keely's baby shower this weekend was enough for me to bite the bullet on getting these done, so I got my supplies in order and started the project. I rented a rug doctor (or the Bissel equivalent, whatevs) from my local Lowe's, and cleaned as much of the grime off of the chairs as I could, then got to work painting.

While the links above will give you plenty of info on how to make this happen, here's how I did it:

Supplies:
1 quart Valspar paint (which is apparently actually acrylic based)
Fabric Medium (I used 3 containers of the Martha Stewart Brand one)
Spray Bottle for water
Paint brush (love my 2" angled brush with a short handle, the Wooster Shortcut is a great one)

Method:

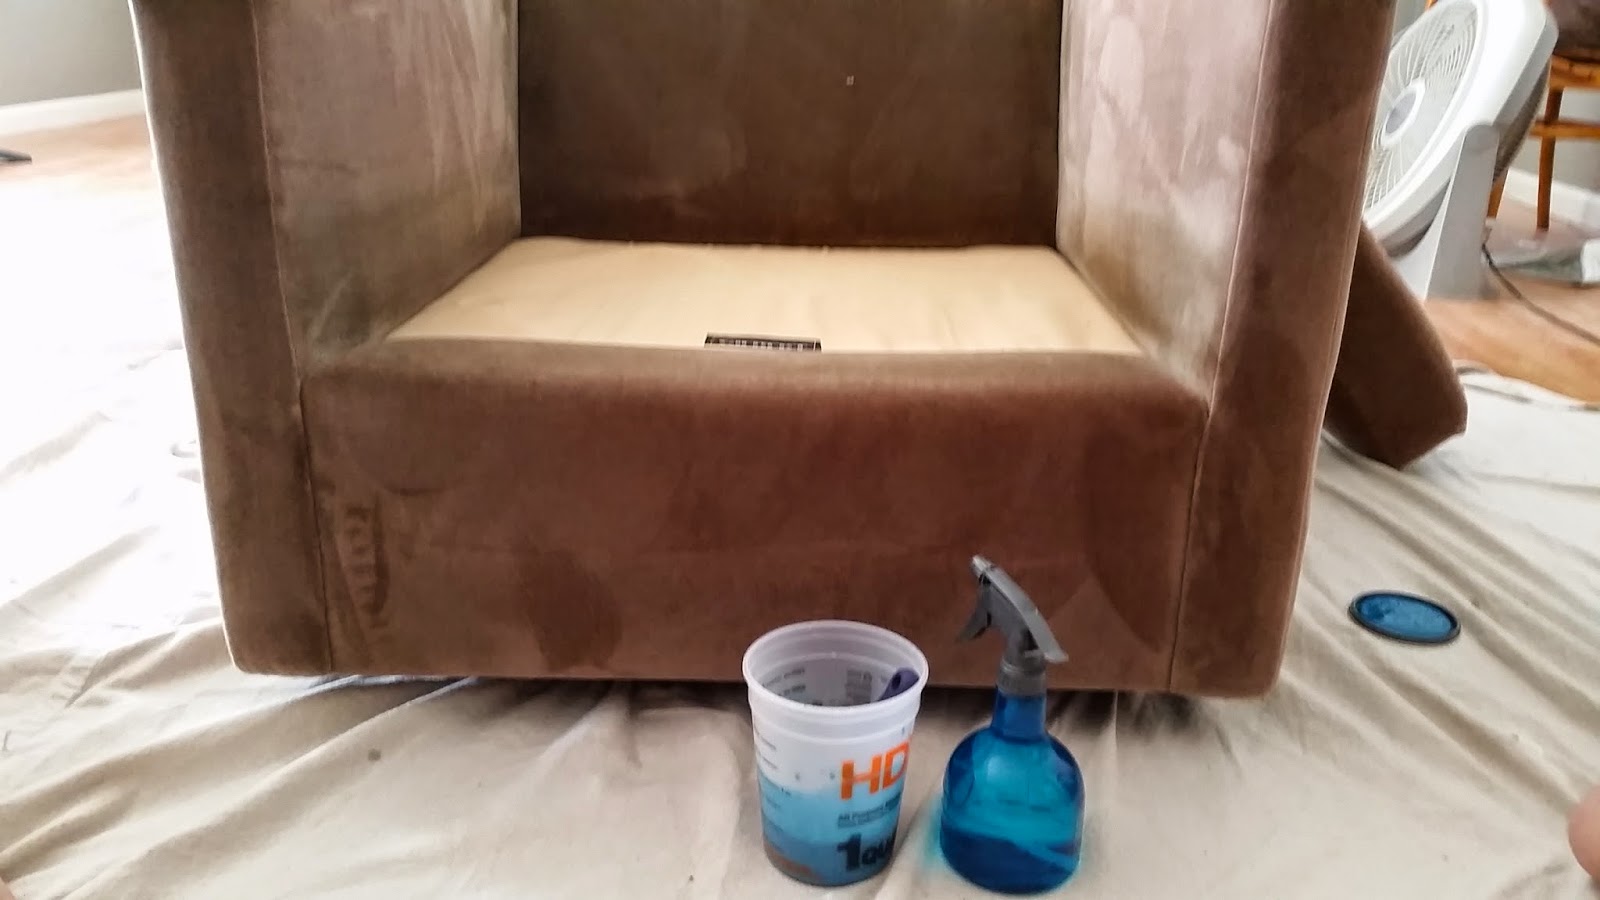
In one of the measuring paint cup things from Home Depot, I mixed a 1:1 ratio of paint and fabric medium. Then, in the smaller measuring cup pictured, I mixed a 1:1 ratio of the paint/fabric medium mixture and water. In retrospect, it wasn't necessary to do this in a separate container, but I was worried about getting the consistency right and didn't want to mix too much at once.

The mixture should look thin and watery, kind of like a stain.

Spray a section of the fabric with water until it's slightly damp, then use your brush to paint on a thin layer of your paint/fabric medium/water mixture. Keep working in sections until you've done one coat of paint.


After a few hours (or overnight) of dry time, sand down any rough spots and repeat for second coat.
Here are my chairs after two coats of paint: 


 Meanwhile, I'd decided that painting the cushions was going to be too fiddly for my tastes, and tried using RIT dye to make them a coordinating color. I wanted dark gray with some blue undertones, so I mixed together a bottle of Pearl Gray, Teal, and about half a bottle of black dye with hot water in a large (clean, I bought it specifically for this purpose) trash can inside my bathtub.

After succeeding in getting dye EVERYWHERE (my tub, feet, legs, and fingertips might be permanently stained, I'll spare you the pics), I wrung out as much liquid as I could from the cushion covers and stuck them in my washing machine for a few cold rinse cycles.

When I pulled them out....womp womp. They were very slightly darker than they were originally, and that's just because they were wet. Learn from my mistakes. Don't try to dye synthetic fabrics. -.-

For the third coat of paint, most of the tutorials say to use a thicker mixture - a 1:1 ratio of paint and fabric medium, and a much smaller amount of water. I tried this method, but didn't really like how it was applying, so I ended up watering it down as much as the first two coats with good results.

Here's the "done for now" pic, three coats of paint and sort of dyed cushions:


I decided to leave  the cushions as-is for now. I don't think I want to paint them, the fabric on the body of the chairs is definitely significantly stiffer (kind of like a slightly rough canvas), and I don't think that's what I would like for the cushions. I'm thinking down the line I may try to sew new covers for them - I love this fabric and think it would pair nicely with the teal.

I'd also like to add tapered legs once I save up for them - they'll end up being around $40 for the legs & attachment plates. I'm keeping an eye on these at Lowes, which I think will work really well after seeing this post at Design*Sponge.